Why a 40 Amp Subpanel Might Be the Solution You're Looking For
A 40 amp subpanel is a smaller electrical distribution panel that extends power from your main breaker box to a specific area of your property. If you're running out of circuit space in your main panel or need dedicated power for a garage, workshop, or shed, a subpanel gives you more capacity without overloading your existing system.
Quick Answer: What You Need to Know About a 40 Amp Subpanel
- Power Capacity: Provides up to 9,600 watts (240V x 40A), or 7,680 watts for continuous loads (80% rule)
- Wire Size Required: Minimum 8 AWG copper or 6 AWG aluminum for the feeder circuit
- Code Requirements: Must use a 4-wire feeder (2 hots, 1 neutral, 1 ground) from a double-pole breaker
- Common Uses: Garages, workshops, sheds, hot tubs, EV chargers, and home additions
- Grounding: Detached structures require two 8-foot ground rods spaced at least 6 feet apart
- Permits: Most jurisdictions require a permit and inspection for subpanel installations
Many Long Island homeowners find they need a subpanel when they're adding power-hungry equipment like an EV charger or upgrading a workshop with multiple tools. As one electrician noted in a forum discussion, "It might be easier and less expensive to add a 30 or 40 amp subpanel and move several single-pole loads to it" when your main panel is full.
A 40 amp subpanel isn't just about adding circuits—it's about safely distributing power where you need it most. Whether you're converting a garage into a workspace or adding amenities to a detached building, understanding the basics of subpanel sizing, wiring, and code compliance will help you make informed decisions.
The challenge is that electrical codes can be confusing. A common misconception is that you can run a simple 120V circuit to power a subpanel. In reality, even if you only need 120V circuits, code requires a 120/240V feeder with proper grounding. Getting this wrong isn't just a failed inspection—it's a safety hazard.
 supplying both 120V and 240V power to branch circuits in a detached garage or workshop - 40 amp subpanel infographic step-infographic-4-steps")
What is a 40 Amp Subpanel and Why Do You Need One?
Imagine your home's main electrical panel as the central nervous system of your power supply. It takes electricity from the utility, then distributes it through various circuits to different parts of your house. But what happens when you need more power in a specific area, or when your main panel is simply full? That's where a 40 amp subpanel comes in handy.
A subpanel is essentially a smaller, secondary electrical panel that branches off from your main service panel. Think of it as a "mini breaker box" designed to extend and organize your electrical circuits in a particular location. Instead of running numerous individual circuits all the way back to your main panel, a single, larger feeder cable runs from the main panel to the subpanel. This subpanel then distributes power to several smaller circuits in its immediate area. This setup not only extends power but also helps to organize your electrical system, making it easier to manage and troubleshoot.

Common Applications
The versatility of a 40 amp subpanel makes it ideal for a variety of uses, especially for homeowners in Long Island looking to improve their property's electrical capabilities. Some of the most common applications we see include:
- Garages and Workshops: These spaces often house power-hungry tools like saws, compressors, welders, and other machinery. A subpanel provides dedicated circuits, preventing nuisance trips in your main house.
- Home Additions: When you expand your living space, a subpanel can efficiently power the new rooms without overtaxing existing circuits.
- Sheds and Outbuildings: Whether it's for lighting, a mini-fridge, or basic tools, a subpanel can bring reliable power to detached structures.
- Hot Tubs and Spas: These require dedicated 240V circuits, and a subpanel can provide the necessary power safely and conveniently.
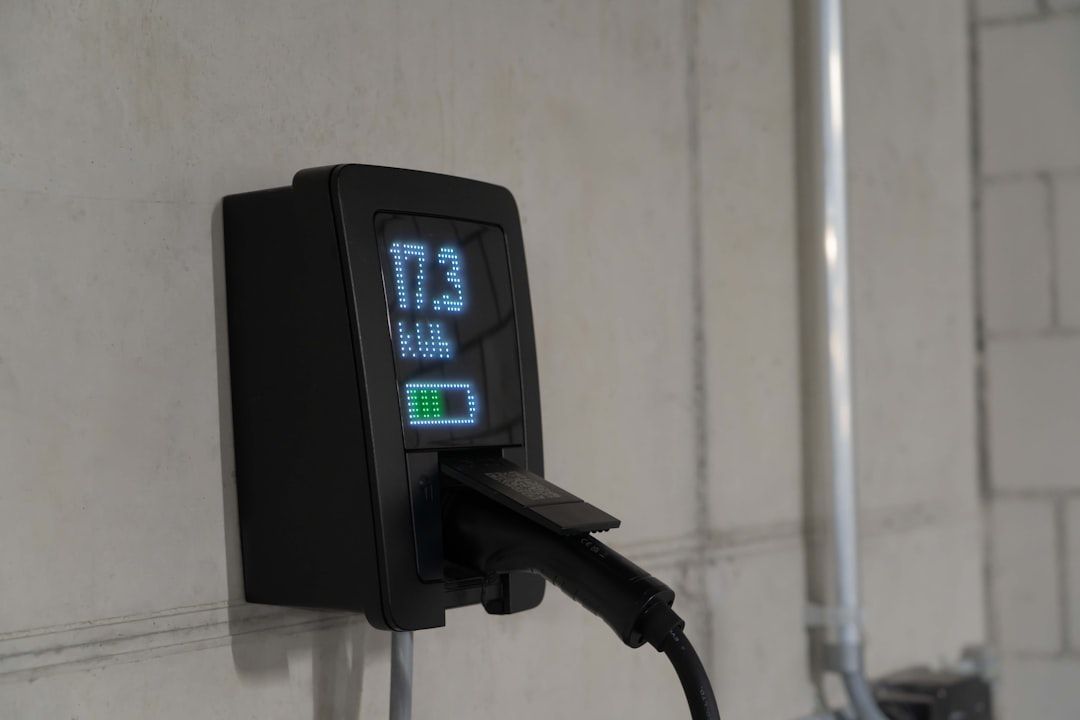
- EV Chargers: With the rise of electric vehicles, many homeowners are installing Level 2 EV chargers. These often require significant amperage, and a subpanel can be a perfect solution to accommodate this demand. In fact, PSEG Long Island customers can even receive rebates for qualified ENERGY STAR Level 2 EV chargers, and federal tax credits for panel upgrades to support them.
- Specialty Services: For any unique electrical needs, from advanced home automation to custom outdoor lighting, a subpanel can provide the flexibility and capacity you require. At Zion Electric Inc., we offer Specialty Services to help you integrate these solutions seamlessly and safely into your home.
Understanding the "40 Amp" Rating
When we talk about a " 40 amp subpanel," the "40 amp" refers to the maximum amount of electrical current (amperage) that the subpanel's main breaker can safely handle. This main breaker is located in your primary service panel and acts as the gatekeeper for all power flowing to the subpanel.
So, what does 40 amps actually mean in terms of usable power? For a standard 240-volt system in the United States, a 40 amp circuit can theoretically supply up to 9,600 watts of power (240 volts * 40 amps). This is your total power capacity. However, there's a crucial rule to remember: the 80% rule.
For continuous loads—appliances or equipment that run for three hours or more at a time—the National Electrical Code (NEC) recommends that a circuit should only be loaded to 80% of its capacity. This safety margin prevents overheating and premature wear on your electrical system. For a 40 amp subpanel, this means your practical continuous load limit is closer to 32 amps (40 amps * 0.80), or about 7,680 watts (240 volts * 32 amps). Understanding this load limitation is key to preventing overloading and ensuring the longevity and safety of your electrical setup.
Planning Your Installation: Sizing and Code Requirements
Before you even think about picking up a wire stripper, planning is paramount. Installing a 40 amp subpanel involves significant electrical work, and safety must always be your number one priority. This means not only understanding the technical aspects but also adhering to the National Electrical Code (NEC) and any specific local permits required in Long Island. Electrical safety codes are constantly changing, and what was acceptable yesterday might not be today. Always check with your local authorities in Holtsville or elsewhere on Long Island for specific permit requirements.

Essential Code Requirements for a 40 Amp Subpanel
The NEC provides strict guidelines for subpanel installations to ensure safety and prevent electrical hazards. Here are the critical requirements for a 40 amp subpanel:
- 4-Wire Feeder Circuit: A subpanel must always be supplied by a 4-wire feeder circuit from your main panel. This includes two hot wires (carrying 120V each), one neutral wire, and one equipment ground wire. This setup ensures proper current return and safety grounding.
- 120/240V Supply: Even if you only plan to use 120V circuits within your subpanel, the feeder circuit from the main panel must provide a 120/240V supply. This is crucial because the subpanel itself is designed to handle both voltage types, and proper balancing of loads across the two hot legs (phases) is essential for the overall health of your electrical system. A 40-amp double-pole breaker installed at the main panel provides this necessary 120/240V supply.
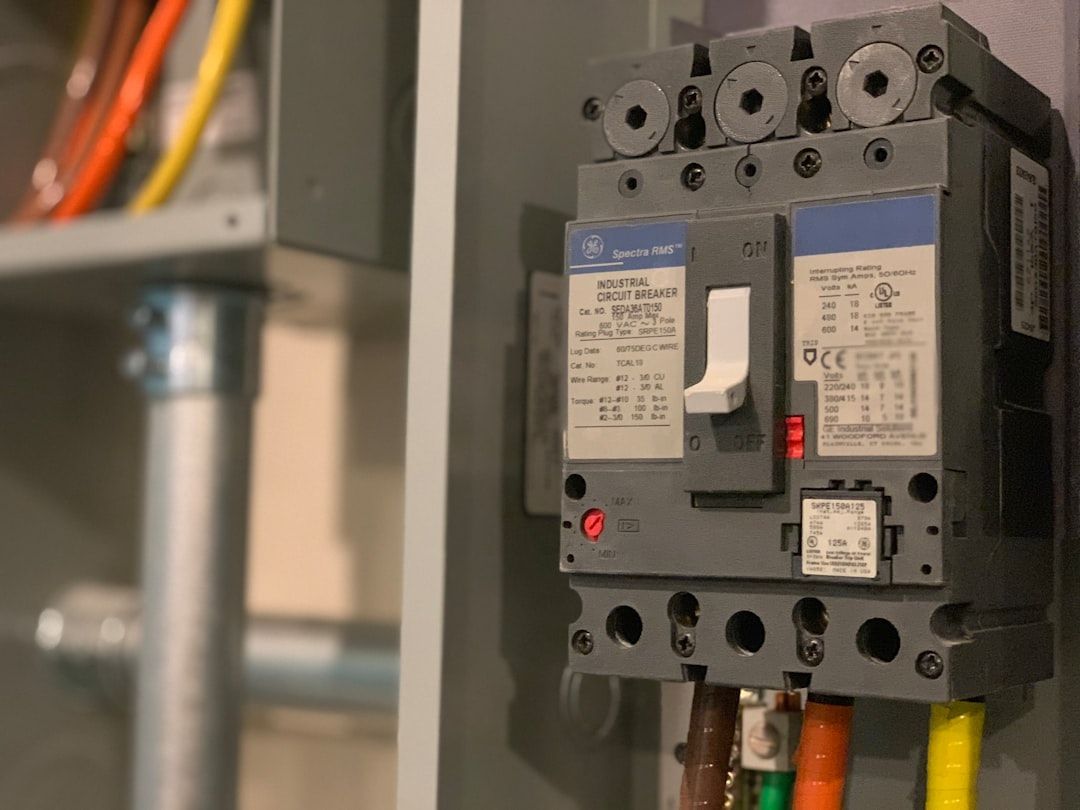
- Double-Pole Breaker: The feeder circuit for your 40 amp subpanel must originate from a 40-amp double-pole breaker in your main electrical panel. This breaker protects the entire subpanel circuit and ensures both hot legs are disconnected simultaneously in case of an overload or fault.
- Detached Structure Grounding: If your subpanel is in a detached structure (like a shed or garage), it requires its own grounding system. This typically involves installing two 8-foot ground rods, spaced a minimum of 6 feet apart, driven into the earth near the subpanel. The ground rod wire should be 8 AWG copper, protected in 1/2" conduit.
- Separating Neutral and Ground: In a subpanel, the neutral bus bar and the equipment ground bar must be kept separate and isolated from each other. Unlike in the main service panel where they are bonded, in a subpanel, the neutral connection is returned via the neutral wire back to the main panel, while the ground connection is provided by both the ground wire from the main panel and the local ground rods. This separation is vital for safety, as it prevents current from flowing on the ground wires during normal operation.
Choosing the Right Wire for Your 40 Amp Subpanel
Selecting the correct wire size is non-negotiable for safety and performance. The wire gauge dictates its ampacity (the maximum current it can safely carry). For a 40 amp subpanel feeder circuit, the NEC has specific requirements:
- Copper Wire: You'll need a minimum of 8 AWG (American Wire Gauge) copper wire for the hot and neutral conductors.
- Aluminum Wire: If you opt for aluminum conductors, a minimum of 6 AWG aluminum wire is required. Aluminum wire typically needs to be one size larger than copper for the same ampacity due to its lower conductivity.
- Ground Wire: For a 40-amp feeder, a 10 AWG copper or 8 AWG aluminum wire is generally sufficient for the equipment ground conductor.
- Temperature Rating: It's crucial to use the correct temperature column when referencing wire ampacity charts. Most circuit breakers are rated at 75°C, so you should use the 75°C column for your wire selection.
- Voltage Drop: For longer runs, especially beyond 50-75 feet, you might need to use a larger wire gauge than the minimum to compensate for voltage drop. Voltage drop can lead to reduced efficiency and potential damage to appliances. If you're unsure about calculating voltage drop or selecting the right size, consulting a professional is always the safest bet. You can find more information on determining the right size capacity for a subpanel here: How to Determine the Right Size Capacity of a Subpanel?.
- Conductor Types: If your feeder cable will be buried underground, it must be rated for wet environments, such as THWN (Thermoplastic Heat and Water-resistant Nylon) conductors, or direct burial UF (Underground Feeder) cable. Standard THHN (Thermoplastic Heat-resistant Nylon) is not rated for wet underground use.
Using undersized wire is a severe fire hazard. A 10 AWG copper wire, for instance, is only rated for a maximum of 30 amps, not 40 amps. Don't take chances; ensure your wire gauge matches or exceeds the requirements for your 40 amp subpanel.
Calculating Load and Circuit Capacity
Once your 40 amp subpanel is installed, the next step is to figure out how to best use its capacity. This isn't just about counting breaker slots; it's about understanding the total electrical load you plan to put on it. We call this "load diversity" – the idea that not all appliances and lights will be running at full power simultaneously. While your subpanel has a total capacity, effective load management means balancing what you plug in.
Continuous vs. Non-Continuous Loads
Understanding the difference between continuous and non-continuous loads is fundamental to safely loading your 40 amp subpanel.
- Continuous Loads: These are loads where the maximum current is expected to continue for three hours or more. Examples include electric heating elements, some lighting fixtures, or any motor that runs for extended periods. For continuous loads, the circuit breaker should only be loaded to 80% of its rating. For a 40 amp subpanel, this means you should not plan for more than 32 amps (40 amps * 0.80) of continuous load.
- Non-Continuous Loads: These are loads where the maximum current is not expected to continue for three hours or more. Think of intermittent power tools, a microwave, or a coffee maker. These can be loaded closer to the full capacity of their individual branch circuits, as long as the total simultaneous draw on the subpanel doesn't exceed its overall capacity.
This 80% rule is a critical safety factor that prevents breakers from tripping unnecessarily and ensures the longevity of your electrical components.
How Many Breakers Can You Install?
This is a common question, and the answer isn't a simple number. A 40 amp subpanel with, for example, 6 spaces, can technically accommodate up to 6 standard single-pole breakers (or more with tandem/mini breakers if the panel allows). However, the number of breakers you can install is limited by the total load, not just the physical spaces.
As the research indicates, "You can install as many breakers as the panel has spaces, provided the total simultaneous load does not exceed the 40A feeder breaker's capacity." For continuous loads, this means your total draw should not exceed 32 amps.
Let's consider an example: If you have a 40 amp subpanel and want to install 20 amp breakers, you could theoretically have several. However, if you plan to run multiple high-draw items, like a 1500-watt space heater (about 12.5 amps at 120V) and a 1500-watt air compressor simultaneously, you're already drawing 25 amps. Add some lighting and perhaps a stereo, and you could quickly approach the 32-amp continuous load limit or even the 40-amp absolute limit for non-continuous loads.
The key is to:
- Calculate your total anticipated load: List all the devices and appliances you plan to power from the subpanel and find their wattage.
- Convert to amperage: Divide the total wattage by the voltage (e.g., 120V for single-pole circuits, 240V for double-pole circuits).
- Consider simultaneous use: Be realistic about what will be running at the same time.
- Balance loads: For 120/240V subpanels, it's good practice to balance the 120V loads as evenly as possible across the two hot legs (phases) of the panel. This ensures efficient operation and prevents one side from being overloaded while the other is underused.
- Allow for future expansion: It's always wise to leave some spare capacity and breaker spaces for future needs.
While a 240-volt, 6-space subpanel fed by a 2-pole 40 amp breaker can support up to 6 individual 20 amp breakers, the actual usable capacity is limited by the total load, which should not exceed 32 amps for continuous use. We often tell our clients, "It's like having a big wallet (many spaces), but only so much cash (amperage) inside."
A Guide to Safe Subpanel Installation
Disclaimer: Electrical work is hazardous. This guide is for informational purposes. Always prioritize safety and consider professional help.
Installing a 40 amp subpanel is a complex electrical task that, if done incorrectly, can lead to serious hazards including fire, electric shock, and damage to your property. While we're providing this overview for your understanding, we strongly recommend that all subpanel installations be performed by a qualified, licensed electrician. At Zion Electric Inc., we specialize in safe and Certified Installations across Long Island, ensuring all work meets the highest standards and local codes.
Step-by-Step Installation Overview (Professional Assistance Recommended)
If you're curious about the process, here's a simplified overview of the steps involved in safely installing a 40 amp subpanel:
- Turn Off Main Power: Before any work begins, the main breaker in your primary service panel must be switched off to de-energize the entire system. This is non-negotiable for safety.
- Install 40A Double-Pole Breaker: A new 40-amp double-pole breaker is installed in your main panel. This breaker will feed the subpanel.
- Run Feeder Cable: The appropriate 4-wire feeder cable (e.g., 8 AWG copper or 6 AWG aluminum, 2 hots, 1 neutral, 1 ground) is run from the main panel to the intended location of the subpanel. This cable must be protected in conduit if exposed or buried.
- Mount the Subpanel: The subpanel enclosure is securely mounted in its chosen location.
- Connect Conductors:
- The two hot wires from the feeder cable are connected to the main lugs of the subpanel.
- The neutral wire is connected to the isolated neutral bus bar in the subpanel.
- The equipment ground wire is connected to the separate ground bus bar in the subpanel.
- Grounding Detached Structures: If the subpanel is in a detached building (like a shed), two 8-foot ground rods are driven into the ground, minimum 6 feet apart, and connected to the subpanel's ground bus bar with an 8 AWG copper wire.
- Install Branch Circuits: Once the feeder is connected and grounded, individual branch circuit breakers (e.g., 15A or 20A) are installed in the subpanel, and their respective circuit wires are connected.
- Final Safety Checks: Before re-energizing, a thorough inspection is performed to ensure all connections are tight, wiring is correct, and all code requirements are met. Voltage testers are used to confirm circuits are de-energized before touching any wires and to verify proper voltage once power is restored.
Common Pitfalls and Overloading Risks
Even with the best intentions, DIY electrical work can lead to dangerous mistakes. When it comes to a 40 amp subpanel, common pitfalls often include incorrect wire sizing, improper grounding, and overloading.
| Feature | Correct Installation | Incorrect Installation |
|---|---|---|
| Feeder Wires | 8 AWG Copper or 6 AWG Aluminum (4-wire) | 10 AWG Copper (undersized), 3-wire, or mixed gauges |
| Grounding (Detached) | Two 8-foot ground rods, neutral/ground separated in subpanel | No ground rods, neutral/ground bonded in subpanel (code violation) |
| Load Calculation | Adheres to 80% rule for continuous loads (max 32A) | Exceeds 40A total, or 32A continuous load, leading to frequent trips |
| Breaker Type | 40A double-pole breaker in main panel | Single-pole breaker, incorrect amperage, or wrong type |
| Receptacles | All shed receptacles GFCI protected | No GFCI protection for outdoor/shed receptacles |
The risks of overloading a 40 amp subpanel are significant and should not be underestimated:
- Fire Risk: Overloaded circuits draw too much current, causing wires to overheat. This can melt wire insulation, damage electrical components, and ultimately lead to electrical fires.
- Damaged Electronics and Appliances: Fluctuations in voltage and current due to overloading can stress and damage connected electronics and appliances, shortening their lifespan or causing immediate failure.
- Frequent Breaker Trips: While inconvenient, frequent trips are your system's way of telling you it's overloaded. Ignoring these warnings can lead to the more severe consequences mentioned above.
- Incorrect Wiring Hazards: Using the wrong wire size (e.g., 10 AWG copper for a 40-amp circuit) is a direct path to overheating. Improper grounding or neutral/ground bonding can create dangerous fault paths, risking electric shock.
- Failed Inspections: In Long Island, electrical installations are subject to inspection. Incorrect wiring or non-compliance with the NEC will result in failed inspections, costly rework, and potential fines. We've seen many situations where homeowners try to cut corners, only to face more expenses in the long run to fix code violations.
Frequently Asked Questions about 40 Amp Subpanels
Can I run only 120V circuits from a 40 amp subpanel?
Yes, you can certainly run only 120V circuits from a 40 amp subpanel. However, it's crucial to understand that the subpanel itself must still be fed by a 120/240V, 4-wire circuit from a double-pole breaker in your main panel. Even if you don't use the 240V directly, the subpanel's bus bars are designed to receive both 120V phases, and the neutral wire is essential for completing 120V circuits. This setup ensures proper load balancing and code compliance. Attempting to feed a subpanel with only a single 120V line is a significant code violation and a safety hazard.
What's the maximum wattage a 40 amp subpanel can handle?
The theoretical maximum wattage a 40 amp subpanel can handle is 9,600 watts (240V * 40A). However, for safety and compliance with the 80% rule for continuous loads (anything running for 3+ hours), the recommended maximum continuous wattage is 7,680 watts (32A * 240V). It's always best to design your subpanel's load to stay within this 80% guideline to prevent overheating and ensure reliable operation.
Do I need a permit to install a 40 amp subpanel?
In most jurisdictions across Long Island, yes, you will absolutely need a permit to install a 40 amp subpanel. Electrical work that involves adding a new subpanel is considered a significant alteration to your home's electrical system and typically requires a permit and subsequent inspection by local authorities. This ensures that the installation meets all current National Electrical Code (NEC) standards and local building codes, safeguarding your property and its occupants. Failing to obtain a permit can lead to fines, difficulties with insurance claims, and complications when selling your home. We always advise our clients to secure the necessary permits before starting any electrical project.
Conclusion
Installing a 40 amp subpanel is an excellent way to expand your home's electrical capacity, organize circuits, and bring reliable power to areas like garages, workshops, or sheds. It offers added power where you need it most, preventing frustrating breaker trips and allowing for the safe operation of multiple appliances and tools.
However, as we've explored, the process involves intricate details concerning wire sizing, load calculations, and strict adherence to electrical codes. The importance of safety and code compliance cannot be overstated; incorrect installation can lead to serious risks.
For over 30 years, Zion Electric Inc. has provided Long Island with expert electrical solutions, including safe and reliable subpanel installations. Our family-owned business prides itself on clear communication, quick response, and top-tier workmanship. If you're considering adding a subpanel to your property and want to ensure it's done right, safely, and to code, explore our general electrical services. We're here to help you power your projects with peace of mind.